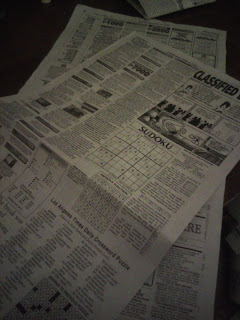
To make a sturdier bag, I used two layers of newsprint.
1. Use two full section-sized pieces of paper...measurements at approximately 11" x 23."
2. Measure out 1" from what you want to be the top of the bag (make sure the print you want on the outside is on the bottom) and measure out 3" from the bottom of the bag. Fold at these 1" and 3" marks.
3. Next, measure from the left to right side (length-wise) in the following segments: 6," 4," 6," and 4"....whatever is left is fine (I had about 2 1/2" leftover). Fold at these marks. the 4" sections will make up the sides of the bag while the 6" sections will be the front and backs of the bag.
4. You should be able to clearly view all your fold marks. With both layers matched up, put glue on the little (on mine 2 1/2 ") flap left over at the end of your 6" and 4" measurements. Bring the other side around, lining it up with the fold at the 2 1/2" mark...you should have now created a cylindar.
5. Next, with the bottom, or 3" fold facing you, fold in the short sides till the 3" mark....it should look like you're wrapping a present.
Place glue on the triangular portions you've now created (I used glue stick) and glue up against the bottom of the bag. I pressed from the inside of the bag to make the adhesive more secure.
6. Your bag is almost complete! Gently holding the bag by the sides, begin the create the folds for the sides of the the bag that will allow it to fold up flat...this worked fairly naturally for me, the paper seemed to know where to fold...I just guided. Then press all the fold flat to create good creases.
7. Finishing touches! Punch holes where you'd like your handles to be. Cut your handles for string or ribbon or yarn you want to use (I cut ming about 14" long). String the handles throught the punched holes and tie knots on the inside.
Finally, cut a piece of cardboard or cardstock approximately 4" by 6" to place in the bottom of the bag to reinforce it. I used part of a cereal box. Place the insert in the bottom or your bag and you're done! Your bag should now measure about 7" tall, 6" wide, and 4" deep! Happy gifting :)
A community exploration or recylced crafts: what to do, what to use, and what works best...
11.04.2010
11.03.2010
Cardboard Stampers
Create custom wrapping paper, cards, stationary and more using just cardboard, string or rubber bands, glue, and a little paint.
1.Cut two pieces of cardboard that are the same size.

2.Cut three pieces that are slightly smaller than the pieces cut in step 1.

3.Glue the two larger pieces together from step 1.
4.Glue the 3 smaller pieces together from step 2.

5.Now glue the three smaller pieces to the back of the two larger pieces from step three. This will create a little handle to make stamping easier.

6.Use rubber bands and secure the glued stack of cardboard pieces and let dry.

7.Once the glue is dried remove the rubber bands.
8.Use a marker and draw your design on the front of the stamper with the larger pieces. You may want to work out your design in advance on a piece of paper.

9.Coat the front of the stamper with white, non-toxic, school glue going over the design which should still be visible from under the glue.


10.Place string or rubber bands over your design and let dry.


11.Once all the glue is dry, use a brush to paint the front of your stamper then firmly and evenly press onto paper.
Create custom wrapping paper, cards, and more with just cardboard, string (or rubber bands), and glue.

Here’s an example using a small blue rubber band and a cut up flat white rubber band.

An example of a used string stamper.
Here are easy to print instructions.
1.Cut two pieces of cardboard that are the same size.

2.Cut three pieces that are slightly smaller than the pieces cut in step 1.

3.Glue the two larger pieces together from step 1.
4.Glue the 3 smaller pieces together from step 2.

5.Now glue the three smaller pieces to the back of the two larger pieces from step three. This will create a little handle to make stamping easier.

6.Use rubber bands and secure the glued stack of cardboard pieces and let dry.

7.Once the glue is dried remove the rubber bands.
8.Use a marker and draw your design on the front of the stamper with the larger pieces. You may want to work out your design in advance on a piece of paper.

9.Coat the front of the stamper with white, non-toxic, school glue going over the design which should still be visible from under the glue.


10.Place string or rubber bands over your design and let dry.


11.Once all the glue is dry, use a brush to paint the front of your stamper then firmly and evenly press onto paper.
Create custom wrapping paper, cards, and more with just cardboard, string (or rubber bands), and glue.

Here’s an example using a small blue rubber band and a cut up flat white rubber band.

An example of a used string stamper.
Here are easy to print instructions.


